
Little Miss Muffet
Sat on a tuffet,
Eating her curds and whey;
Along came a spider,
Who sat down beside her
And frightened Miss Muffet away!
I grew up chanting this popular nursery rhyme and now recite it to my children, but it wasn’t until I started making Greek yogurt (see how easy it truly is!) that I stopped to think about what “eating her curds and whey” truly meant.
What is Whey?
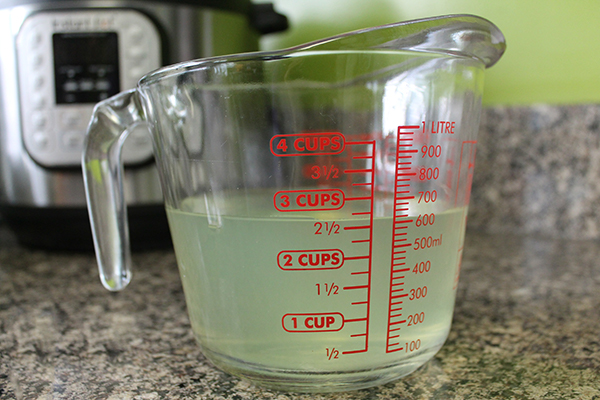
Whey (pronounced WAY) is the yellowish, opaque liquid that remains after milk has been curdled and strained – i.e. a by-product of making yogurt and cheese. The longer yogurt is strained, the thicker it will become as more and more whey is extracted. A batch of homemade yogurt will yield anywhere from 2-4 cups of whey, depending on how thick you like it and what type of milk was used. You can also strain regular store-bought yogurt which will yield about 2 cups of whey per quart of yogurt.
If you were to close your eyes and take a swig of fresh whey, you’d probably think you were drinking a super thin plain yogurt – ever so slightly sour with a smooth creamy mouthfeel. It’s surprisingly refreshing (in small doses).
Storing Whey
Whey has a long shelf life and can be stored in an air-tight container for 3-6 months in the refrigerator or freezer. If you are straining yogurt and your whey is cloudy and contains any yogurt solids, it will only last as long in the fridge as the yogurt, which is about 2 weeks.
Super Liquid
Little Miss Muffet may have been onto something all those years ago eating both her curds AND whey! Liquid whey is primarily composed of lactose, the natural sugar found in milk and yogurt, with about 60 calories, 13 grams of carbohydrates and 2 grams of protein per cup. It is also rich in calcium, phosphorous, B vitamins and of course gut-friendly probiotics.
The pH, and in turn the applications, of whey will vary depending on the dairy product it came from. Acidic whey is strained out of yogurt and soft cheeses (ricotta, cottage, mozzarella) while sweet whey is leftover from making harder cheeses like cheddar and Swiss.

Whey Too Much?
If you’ve ever made Greek yogurt, you know just how much whey is created in the yogurt making process. I make yogurt every 1-2 weeks so there is pretty much always a stash of whey in the fridge. I can’t stand the thought of pouring this super liquid down the drain, so I’ve been culminating a list of creatives uses for leftover whey. Check them out!
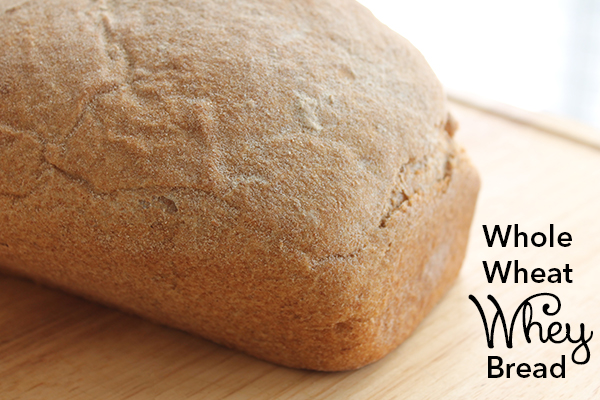
- Make bread or pizza dough. Since I started making yogurt, I haven’t bought a loaf of bread. The whole wheat whey bread recipe below is ridiculously easy to make and freezes well. I also keep a batch of this whole wheat pizza dough (using whey instead of water) in the freezer for last minute pizza nights.
- Pour into smoothies instead of water, milk or juice.
- Bake with it. Swap water or milk for whey in equal amounts in your favorite muffin, pancake or waffle batter.
- Ferment veggies – cauliflower, carrots, onions, broccoli…your choice!
- Soak grains, beans or legumes in whey for a boost of flavor and probiotics.
- Make a marinade. Whey's acidity lends itself well to marinades. Combine whey with herbs and spices of choice and a little olive oil and you’re set.
- Use it as a brine to tenderize chicken or turkey.
- Cook rice, oats or other grains. While heating will kill some of the live cultures and probiotics, you’ll still reap the benefits of the other nutrients since these foods absorb the cooking liquid.
- Make ricotta cheese.
- Add to soup or stew bases, replacing part of the stock or water with whey.
- Use in homemade salad dressing in place of lemon juice.
- Drink it on the rocks. I wouldn’t recommend guzzling down a large glass of whey, but a few ounces over ice can be quite refreshing.
- Whip up a lemon meringue pie for special occasions. (I’ve also skipped the meringue step and made this recipe as a no-bake dish with a graham cracker crust and lemon whey filling.)
- Add it to your beauty routine. Whey’s acidity helps tone skin so add it to your bath water or dab a little on your face with a cotton ball.
- Condition your hair. Rinsing your hair with whey after shampooing can make it smoother and shinier.
- Water your plants with it. Whey contains many nutrients essential for plant growth. Since whey is acidic, it can change the pH of the soil so be mindful of how much you’re dumping into the garden and which plants are receiving the boost of nutrients.
- Feed it to your animals.
- Freeze it! If you have more whey than you use, freeze in an ice cube tray to use later.
Whole Wheat Whey Bread
Recipe Adapted From: Delishably
Makes 2 loaves
PRINT RECIPE
Ingredients
2 cups whey*
1 Tbsp honey
2¼ tsp or 1 packet dry active yeast
1 tsp salt
4 cups whole wheat flour
Directions
1. Warm whey in the microwave for 1-1 ½ minutes or until it reaches 100-110ºF.
2. Stir honey and yeast into warm whey.
3. Pour whey into a large bowl and add salt and flour. You do not need to wait until the yeast activates to add the flour.
4. Gently mix ingredients with a wooden spoon until just combined. Do not knead the dough at this point.
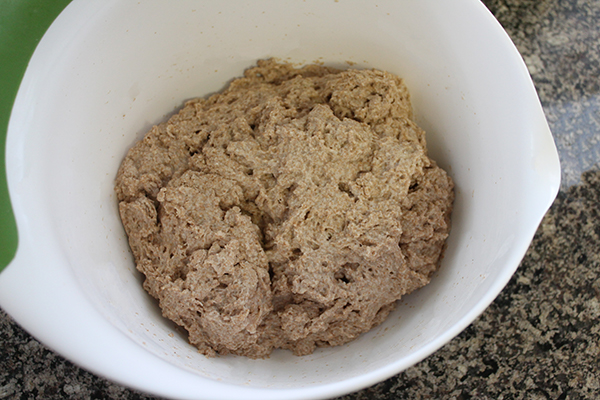
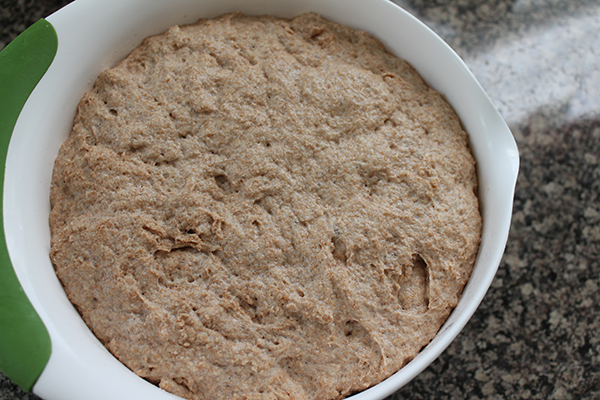
5. Cover bowl with a damp kitchen towel and let the dough rise for about 2 hours or until doubled in size.
6. Rearrange the racks in your oven so that one rack is at the very bottom and the other is in the center. Pre-heat oven to 375ºF.
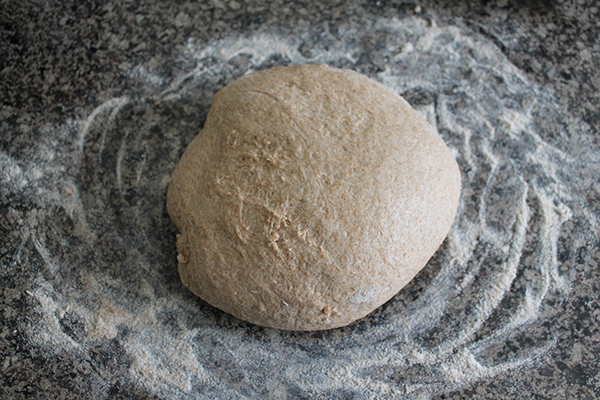
7. While the oven is pre-heating, turn dough on a lightly floured surface. Cut into two equal-sized dough balls. Flour your hands and knead the dough into balls by constantly turning the sides under. Don’t over-knead the dough; you only need to knead the dough for a few minutes.
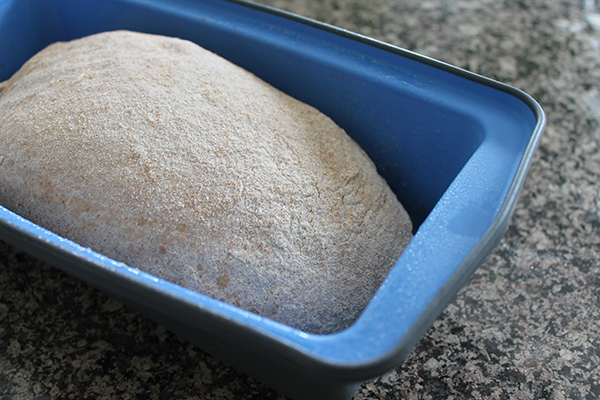
8. Place dough into greased loaf pans.
9. Once oven is heated, place a baking pan on the bottom rack and fill with water. The water will turn into steam which will help the bread retain moisture while giving it a crisp, crunchy crust. Add more water if it all evaporates before the bread is done.
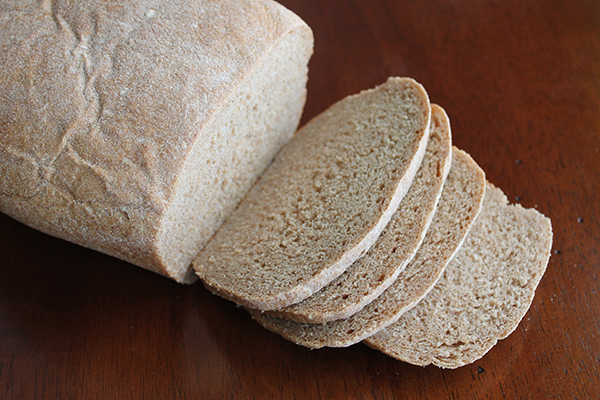
10. Bake for 20-25 minutes. Cover bread with aluminum foil and allow to cook for another 20-25 minutes or until the outside is brown and crusty and there is a hollow sound when you tap on the top. The bread is done when it reaches an internal temperature of 190-210ºF measured with an instant read thermometer.

11. Remove from oven and let cool for 10-15 minutes. Unmold by turning the loaf pan on its side. The bread should fall out but if it doesn’t run a knife along the sides of the pan.
12. Let completely cool before slicing. Store at room temperature in a cool, dry place for 2-3 days or wrap well and store in the fridge for 1-2 weeks or the freezer for 2-3 months.
*You can obtain whey by straining homemade or store-bought yogurt. A 32-ounce container of plain yogurt should yield about 2 cups of whey. If you don’t have whey, you can substitute 2 cups of water.

7 Comments
Great Ideas. I had never thought of using whey in so many ways.
I have always loved a crusty rye bread with seeds, can that be made with whey?
It's worth a try. Just replace the water in the recipe with an equal amount of whey.
Hi Ashley
I just made my first yogurt with goats milk and what I strained off looks just like milk, it’s not clear like in your picture. What did I do wrong and can I still use it in recipes? Thanks in advance.
I've never made yogurt with goat's milk, so I'm not sure if that changes anything. Depending on how you strained may also have played a factor in the clearness of the liquid - if it wasn't a super fine strainer then more of the milk could have passed through.
I found your article on liquid whey very informative. I have a lot of whey since my husband started making whey. He uses powdered milk and adds insulin and probiotics. I’m doing intermittent fasting for weight loss and longevity. Will whey break a fast
Hi Joan. Since whey contains calories, carbohydrates and other nutrients, it does break a fast.