
Non-dairy milks are becoming more and more popular. Have you seen all the options at the grocery store lately? There are so many! Unfortunately, many of those options contain ingredients we may not want to have on a regular basis, like added sugar, gums, stabilizers or other fillers. Plus they are not cheap!
Homemade non-dairy milks are fresh, free of additives and preservatives and you can completely control the quality of the ingredients, sugar level, texture and flavors (like adding cinnamon or nutmeg!).
Making your own non-dairy milk isn’t just cheaper, they taste so much better! You will be amazed at the difference in flavor and how easy it is. You can make “milks” out of basically any nut, seed or grain.
Making your own non-dairy milk isn’t just cheaper, it tastes so much better too! Learn the quick and easy steps here! #saslife Share on XJust follow these simple steps:
- SOAK. Place nut, seed or grain of choice in a bowl or other container with filtered water and soak overnight. Soaking helps everything blend more easily and may improve digestibility and nutrient bioavailability. Rinse thoroughly and drain.
- BLEND. Start with 2 cups of filtered water for every 1 cup of nut, seed or grain and blend for 1 minute. You can add more water if you want a thinner milk. A high-speed blender like a Vitamix is preferable to really pulverize the mixture, but it’s not necessary and any blender or food processor will work.
- STRAIN. While you can definitely just enjoy the milk as is, if you want a smoother texture you will want to strain it. Place a nut milk bag or cheesecloth over a large container, pour the milk in, and gently squeeze the bag until all liquid has passed through. You can use the leftover pulp to make crackers or cookies or simply stir into oatmeal or pancake batter. You can also spread the pulp onto a parchment lined baking sheet and bake at 250⁰F (or lower if your oven can) for 1-2 hours until it’s dried out. Then pulse a few times in a food processor and you have almond flour, cashew flour, etc.
- FLAVOR. Add 1 teaspoon of vanilla extract, cocoa powder, cinnamon, nutmeg, etc. This step is completely optional, but can be a fun way to change up the flavor!
Most homemade non-dairy milks will keep in the fridge in a sealed container for 2-3 days. Freeze any leftovers in ice cube trays for use later. Homemade milks can separate when stored so shake or blend again before drinking.
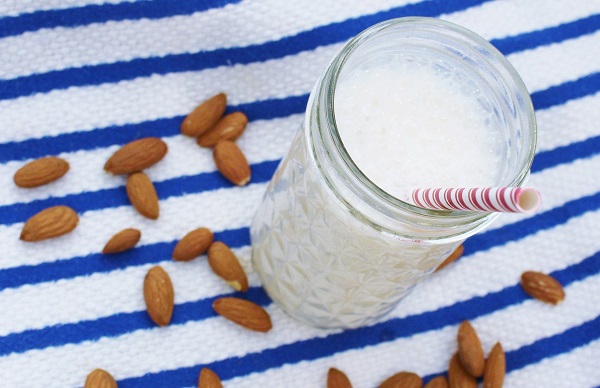
If you make these “milks” on a regular basis, add some variety by using different nuts, seeds, or grains*. Instead of just almond milk, how about cashew, macadamia, Brazil nut, hazelnut, pecan, pistachio, coconut, hemp seed, pumpkin seed, sunflower seed, sesame seed, flaxseed, quinoa, millet, rice, or oat milk! They can all be turned into a fresh non-dairy milk!
*Note: For grains (except oats), cook first before blending.
Check out this video on Making Homemade Almond Milk
Click here for a printer-friendly version of this recipe.

2 Comments
Kelly do you have any tips for oat milk? I have tried cheese cloth and it is not fine enough of a filter. I have also use a t-shirt and it works well but cumbersome
Hi Mark, I have actually never made oat milk myself. I am a fan of cheese cloth though because you vary the amount of pulp that gets through buy layering it, and you can have many layers so that it ends up being a very fine strainer. You need to start with a pretty big piece though so you can layer it many times. Beyond that, tea towels can work well too. Good luck! 🙂