Why Ferment at Home?
Fermented foods have health-promoting properties, but the store prices or limited selection available to you may have you wondering if you’d be better off making your own.
Don’t be intimated by complicated fermentation vessels or the fear of a science experiment gone wrong. I stalled for years thinking I had to be meticulous about setup and temperature, otherwise making fermented vegetables could be dangerous. Then I calmed down and decided to just give it a try. Along the way, I learned that fermenting vegetables can be quite easy and a really rewarding project!
Home fermenting allows you to create endless flavor possibilities with different herbs, spices, and vegetables and gets you more invested in your own nutrition. If you are a home gardener, you may even find that fermenting foods fills that gap over the cold months when there are no vegetables growing in your backyard.
Love the health benefits of fermented vegetables, but hate the price tag? Make your own! #saslife Share on X
What You’ll Need
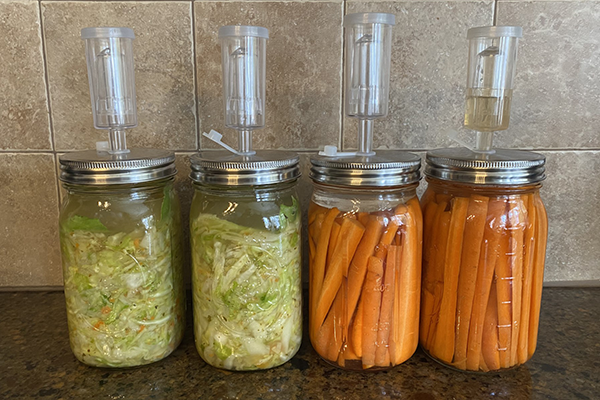
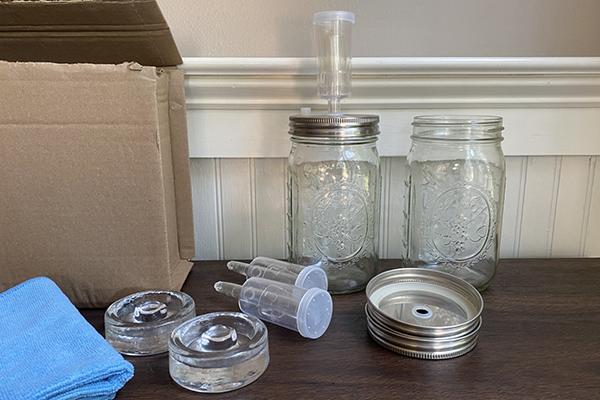
For small batch fermenting, you probably already have everything you need to culture your own creation. It’s as simple as gathering some salt, filtered water, vegetables, a weight, a jar and a top for the jar.
- Container options:
- Small condiment containers
- Jelly jars
- Mason jars
- Weight options to keep the vegetable submerged:
- Ceramic pie weights or marbles in a small plastic bag
- A small, sealable plastic bag filled with water
- Glass weights designed for the fermentation process
- Lid options:
- A regular lid to a jar can work just fine. (You’ll just have to screw it on loosely and open or “burp” the ferment daily to release excess air.)
- Cheesecloth secured with a rubber band can work but might attract fruit flies.
- Airlock lids are made specifically for fermentation so you don’t have to burp the food.
- Something to catch overflow:
- A tray, pan or towels should go under jars and catch any liquid that may spill over.
- A cool(ish) spot away from light:
- Room temperature is generally fine even though some recipes call for slightly cooler temperatures. Keep in mind, the warmer the temperature the quicker the fermentation process.
- Though many fermentation recipes call for a cool, dark place, a garage or basement isn’t needed. A cardboard box to cover things up can work just fine.
My setup of choice is pretty simple. I line a carboard box with old dish towels, fit in the mason jars full of veggies, salt water, weights and air lock lids. Then, I tuck the box in a corner of a room in my home where it won’t be disturbed. The average temperature ranges from 65-75°F in there most of the time. I check on my science experiments daily and haven’t bombed a batch yet.
Is Home Fermentation Safe?
The salt prevents overgrowth of harmful bacteria, and the acidic environment created by the flourishing probiotic lactobacillus bacteria kills harmful bacteria, so in theory fermented vegetables could be safer than some raw vegetables. The key to safe fermenting is to 1) use the right ratio of salt to water and 2) keep your vegetables completely submerged in this brine.
- The salt and water ratio will be tailored to the type of vegetable you are fermenting (depending on its sugar content, softness, etc.). This brine prevents bad bugs from growing, leaving the good bacteria to convert sugars into lactic acid which preserves the food.
- It is essential to keep the food submerged in salty brine to prevent the growth of harmful bacteria and mold. Weights are often used between the top of the veggies and the surface of the brine to prevent the vegetables from floating up. Any little odds and ends (including herbs and spices) that rise and are exposed to the air may need to get scooped and tossed before tasting. You may wind up with a little mold growing on the surface which should be scraped off.
More on Food Safety:
- Start with clean hands, surfaces, containers, and tools and clean, fresh vegetables. Jars do not need to be sterilized the same way you would for canning foods.
- Use clean hands and utensils for handling all foods. Avoid cross-contamination with other ingredients, such as raw meat or fish before and after the fermentation process.
- Once the vegetables are fermented or close to fully fermented, store them in the refrigerator. They will continue to ferment very slowly over time in colder temperatures.
- Your Nose Knows. Compare how your ferments smell to some others you’ve purchased from the store. Fermented vegetables should smell slightly sour. If it smells terrible…like it’s rotten, throw it out. Exercise caution if you are immunocompromised.
Once you have the right ratio of salt to water, it’s up to you to choose the herbs, spices and aromatics you want to add to jazz up the jar. The sky is the limit.
My Favorite Home Ferments
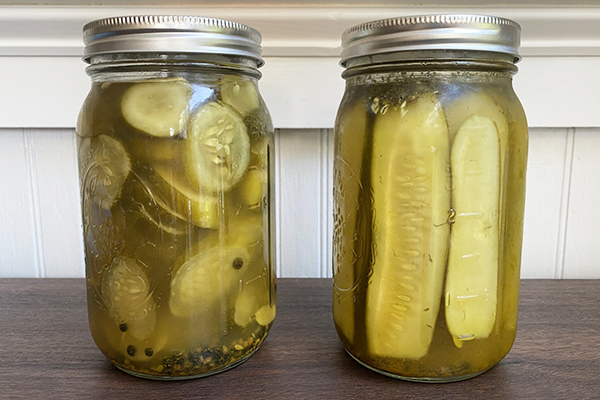
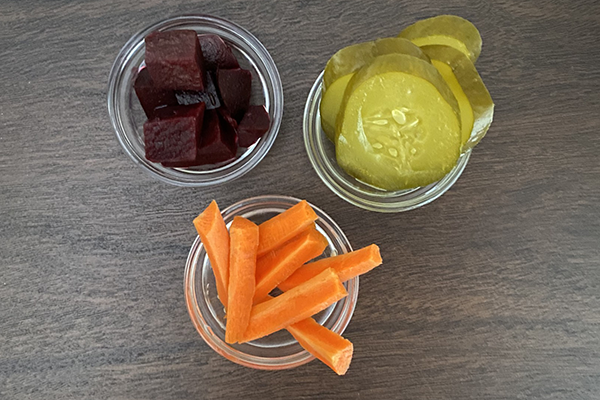
- Garlic Dill Pickles - quick to prep and are ready in just a few days
- Carrots - crunchy with a mild flavor; great for a less-adventurous palate; yummy in a fresh summer roll or as a refreshing snack
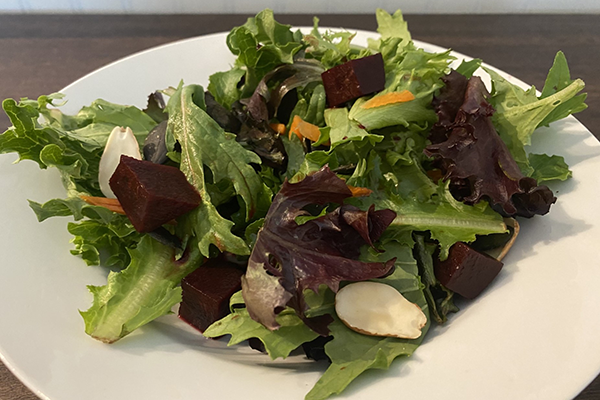
- Beets - worth the red staining your hands and cutting board; perfect on salads or on their own
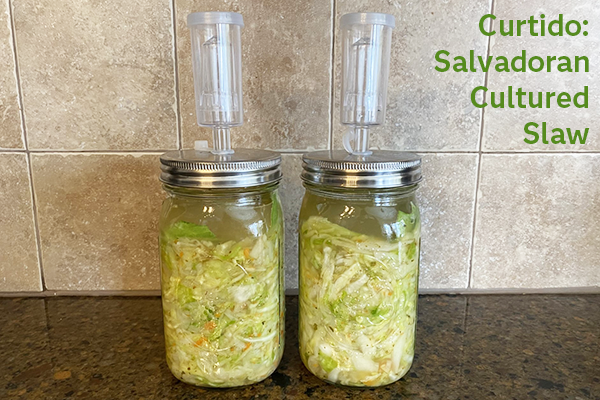
- Curtido - a little more work and prep time required, but this Salvadoran slaw has great flavor
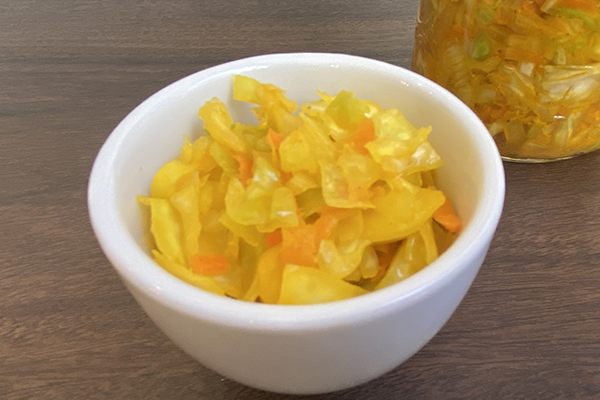
- Golden Kraut - provides a strong punch of flavor to boring dishes; leftover brine can even brighten a simple baked potato
Looking for more ways to make your own healthy foods while saving a few bucks?
Check out Foolproof Instant Pot Greek yogurt and Sprouting Made Simple.
Fermented Beets
Makes 12-16 servings
Recipe from: The Spruce Eats
PRINT RECIPE
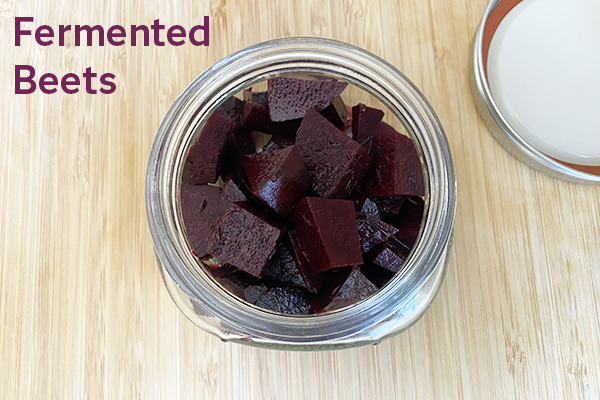
Ingredients
1½ pounds beets, about 2 large
2 - 3 cups room temperature filtered water, non-chlorinated
2 Tbsp kosher salt or sea salt, not iodized
3 - 4 tsp dry thyme, or 3-4 Tbsp fresh thyme
1 - 2 garlic cloves
5 peppercorns
Instructions
- Gather the ingredients. Make sure your hands, jars, tools and work surface are clean.
- Scrub the beets, then cut off the tops and root ends. You can peel them, if desired. Cut the beets into ½ inch cubes, or cut them into ¼ inch thick slices.
- Combine the water and salt in a large measuring cup; stir to dissolve.
- Pack the beets, thyme, garlic and peppercorns in a wide-mouth quart-size mason jar or 2 (1-pint) jars, leaving at least 1 - 1½ inches of headspace to allow for the weight.
- Add enough of the salted water brine to cover the beets completely. To keep beets submerged, add a fermentation weight or another type of weight in a plastic bag. Place a lid on the jar. If you don't have an airlock lid, secure a square of cheesecloth on the jar with a rubber band. Alternatively, screw the lid on loosely and unscrew it periodically to let out any air.
- Place the jar on a baking sheet, shallow bowl, tray or plate to catch any spills or juice that might bubble over. Place the jar in a cool, dark place. When fermentation is underway, the brine may appear cloudy—it will clear after about 1 week or when fermentation is complete.
- Store fermented beets in the refrigerator with a tight-fitting lid from 1 to 2 months. Be sure the beets remain completely submerged in their brine when refrigerated.
Curtido: Salvadoran Cultured Slaw
Makes 25-30 servings
Recipe from: Feasting at Home
PRINT RECIPE
Ingredients
1 medium head of green cabbage, about 2 lbs
1 medium yellow onion
1 cup shredded carrots
1 Tbsp oregano, dried (or ¼ cup chopped fresh)
1 ½ Tbsp fine sea salt
1 jalapeno, sliced in rings (or ¼ – ½ tsp chili flakes), optional
2 1-quart jars (or 4 pint jars)
Instructions
1. Take off a few outer leaves of the cabbage and set them aside. Finely shred or chop cabbage with a mandolin, food processor (with slicing disc) or sharp knife.
2. Thinly slice the onion in half rings. Shred carrots with a grater or use a vegetable peeler to create long flat strips.

3. In a large bowl, place the ingredients (veggies, herbs, onions, and salt) — all except the jalapeno and mix well. Let sit for about 10 -20 minutes allowing the veggies and salt to merge and extract the natural juices. Use a pounder, large pestle or your hands to macerate the mixture.
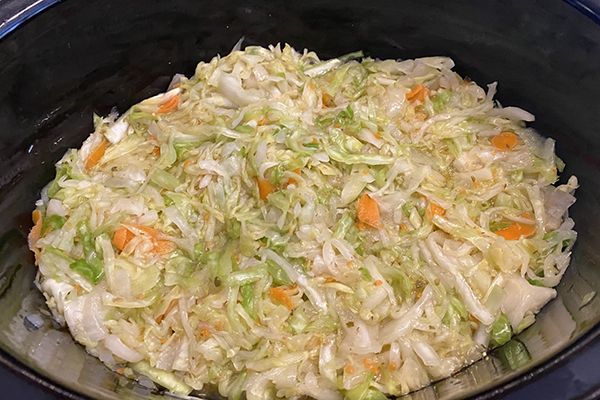
4. Distribute jalapeno rings (or chili flakes, if using) in the bottom of the jars and then fill up the jars with the cabbage mixture packing tightly, pressing down with the pounder, leaving a 1 or 2-inch space at the top. It should be juicy.
5. It is important that the cabbage is completed covered with the liquid. You can add a little brine (salted filtered water) if the cabbage seems dry. (Brine= 1 teaspoon sea salt per cup of water) Packing in a cabbage leaf on top of the mixture can help keep the mixture submerged. Alternatively, you can use a fermentation weight or tuck in a sandwich-sized zip lock bag on the top (fill with water and zip close). This creates a good weight and barrier. Cover the top with a cheesecloth, loose lid or airlock fermentation lid.
6. Leave in a dark corner at room temperature for 3-5 days, checking daily to make sure cabbage is still under liquid, packing down again if need be. You will start to see tiny bubbles rising up from the bottom this means the culturing is happening. Culturing happens faster at warmer temperatures.
7. Refrigerate, keeping the curtido submerged under the brine. It will continue to develop flavor and complexity over time. Curtido will keep for many months, as long as it is submerged under the brine.
8. Use on tacos, pupusas, quesadillas or enchiladas as a delicious healthy condiment.
NOTES ON SALT RATIO:
- The recommended salinity for sauerkraut is 1.5% – 2.5% salt to the weight of the cabbage. Here we use 2% salt to the weight of the cabbage.
- Example: 1000 grams cabbage multiplied x .02= 20 grams of salt.
- Feel free to use more or less as long as it stays between 1.5% and 2.5%.
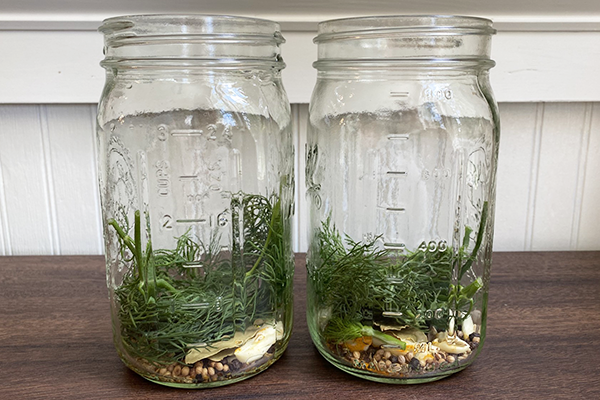
Fermented Garlic Dill Pickles
Makes 25-30 servings
Recipe adapted from: Feasting at Home
PRINT RECIPE
Ingredients
2 - 2 ½ lbs pickling cucumbers, all similar size, around 5 inches long
5 cups filtered water
2 Tbsp fine sea salt or Himalayan salt
1 tsp fennel seeds
1 tsp coriander seeds
1 tsp or more peppercorns
4 bay leaves, sources of tannic acid to help them stay crisp
1 big handful of fresh dill (or 1 tsp dill seed)
¼ tsp ground turmeric (optional, adds a fresh flavor)
10–20 garlic cloves, sliced
1 small onion, thinly sliced (optional)
Instructions
1. Mix 2 Tbsp salt with 5 cups cold water until dissolved.
2. Divide the whole spices into the bottom of 2 wide mouth quart mason jars. Next, add the dill, garlic, onion (optional) and turmeric (optional).
3. Rinse the cucumbers, chop off the flower end of each cucumber to keep them from getting soft, and slice them to desired shape or leave them whole.
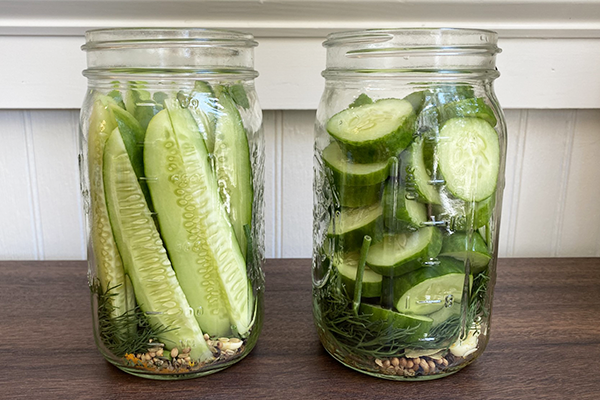
4. With clean hands, pack cucumbers tightly halfway filling the jars, then add the bay leaves, then finish packing cucumbers, leaving 1-2 inches of headroom.
5. Pour the saltwater brine over the top and weigh down the cucumbers with fermentation weights so they are submerged under the brine. Remove any spices that may have floated to the surface (to prevent mold). You may have leftover cumbers and brine depending on how tightly you’ve packed the cumbers and how you sliced them. If so, feel free to set up a third jar and experiment with different herbs and spices.

6. Cover the jars tightly with air lock lids, or you can use regular lids and open the lids daily to let air escape when pickles start to ferment and bubble. Alternatively, you can cover them very loosely with lids or with cloths so air can escape naturally.
7. Place the jars on a tray or cloths to collect any overflow and leave them in a cool, dark place, ideally 60-70°F (e.g., a basement, or lower kitchen cupboard) for 2-3 days. Then check for bubbles, overflow or clouding indicating fermentation. Fermentation times vary based on the temperature and cut of cucumber. Pickle chips or spears will usually take 2-3 days to become half sour. Once you see active bubbles, you can place the jar in the fridge, where it will continue to ferment, but much more slowly. Keep the pickles submerged.
Notes
This recipe is a 3% saltwater brine, which is considered safe. If you want a stronger, saltier brine, feel free to go up to 4.5%. For a full sour pickle with a tangier flavor, use a 4.5% brine and ferment for 14-21 days.
- 3% ratio = 7 grams salt per 1 cup of water (1 ¼ teaspoon fine sea salt, per 1 cup water)
- 3.5% ratio = 9 grams of salt per 1 cup of water (1 ½ teaspoon fine sea salt, per 1 cup water)
- 4.5% ratio = 10.8 grams of salt per 1 cup of water (2 teaspoons per cup of water)
If you need more brine, make sure you use the same ratio.
If pickles turn out too soft, it may be due to too warm of temperature during fermentation, or the flower end wasn’t removed (the flower end of the cucumber has enzymes that can soften pickles). You can also try leaving cucumbers whole and soaking cucumbers in an ice bath for 15 minutes before putting them in the brine.