 Let’s say that you are administering a SAS 9.4 environment that is working just fine. You’ve checked that your full backups are indeed happening and you’ve even tried restoring from one of your backups. You are prepared for anything, right? Well, I’d like to propose a scenario to you. You probably have users responsible for creating reports, maybe even very important reports. What if something happened to one of these reports? Perhaps the user wants to revert to an earlier version. Perhaps the report was accidentally deleted or even corrupted, what then? Restoring a full backup in this situation might help this one user but would likely inconvenience most other users. With a little more preparation, you could “magically” restore a single report if needed. Here’s what you need to do: create a backup of only these critical reports using the promotion tools.
The promotion tools include:
- the Export SAS Package Wizard and the Import SAS Package Wizard available in SAS Management Console, SAS Data Integration Studio, and SAS OLAP Cube Studio.
- the batch export tool and the batch import tool.
Note: Starting with the third maintenance of SAS 9.4, you can use the -disableX11 option to run the batch import and batch export tools on UNIX without setting the DISPLAY variable.
You can use the promotion tools on almost anything found in the SAS Folder tree, especially if you use SAS Management Console. If you use the wizards in SAS Data Integration Studio or SAS OLAP Cube Studio, those applications only allow you to access and export/import objects that pertain to that application, a subset of what is available in SAS Management Console.
You may be thinking that using an interactive wizard is not really the answer you are looking for and you may be right. The batch tools are a great solution if you want to schedule the exporting of some objects on a regular basis. If you are unfamiliar with the promotion tools, I would suggest you start with the interactive wizards. You will find that the log produced by the wizard includes the equivalent command line you would use. It’s a nice way to explore how to invoke the batch tools.
Creating the Export Package
How to invoke the Export SAS Package Wizard:
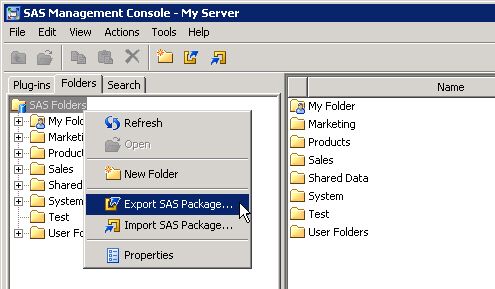
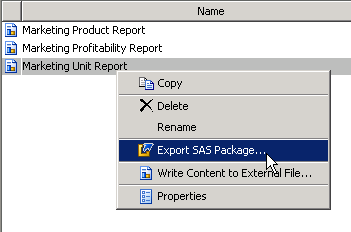
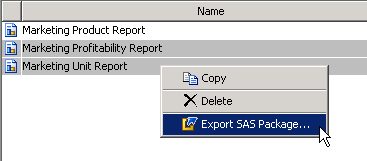
1. Right-click on a folder or object in the SAS Folders tree and select Export SAS Package.
2. Enter the location and name of the package file to be created and set options as appropriate.
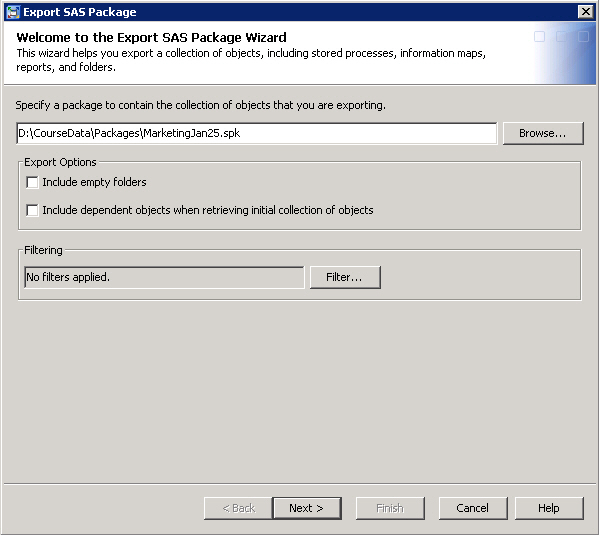
You can opt to Include dependent objects when retrieving initial collection of objects here or you can select specific dependent objects on the next screen.
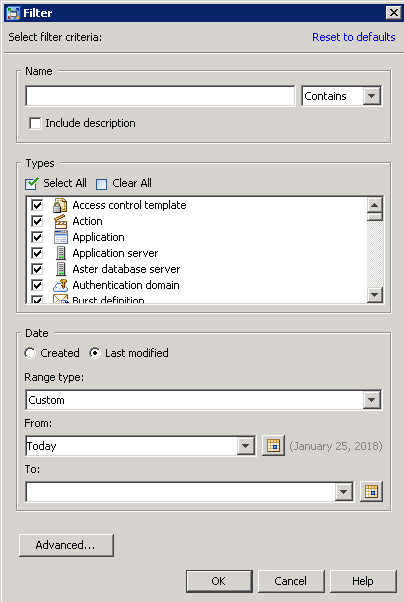
Filtering offers some very interesting ways of selecting objects including:
- By object name
- By object type
- By when objects were created
- By when objects were last modified
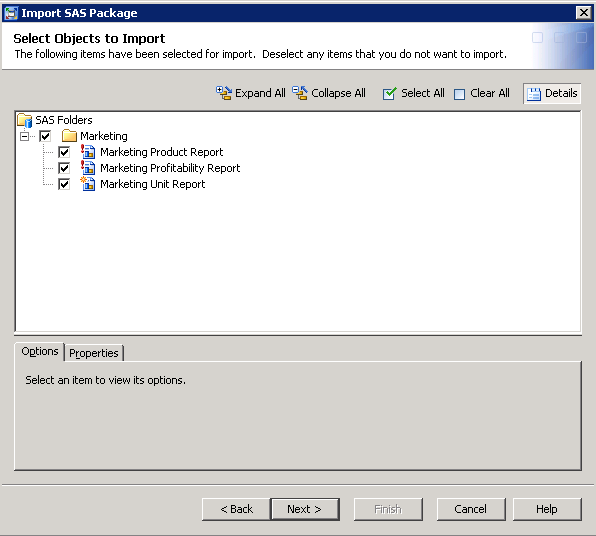
3. Select the objects to export. If you started the process with a folder, you will be presented with the folder and all of its contents selected by default. You can deselect specific objects as you like.
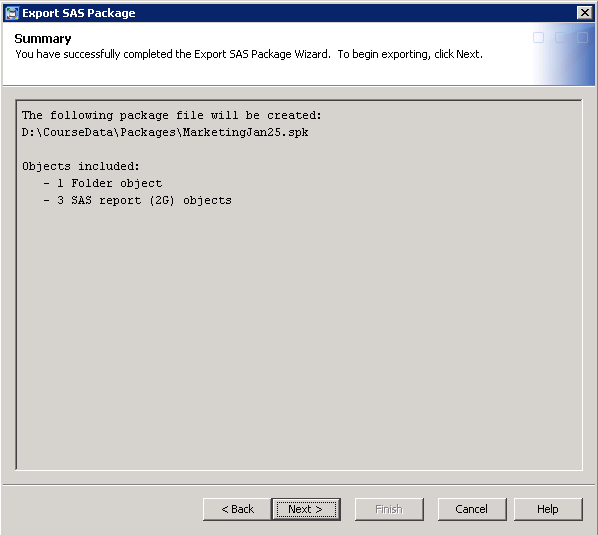
In this example, we only want the Marketing folder and its contents. Deselect the other folders. You want to be careful to not create a package file that is too big.

You can click on individual objects and explore what dependencies the object has, what other metadata objects use the current object, options and properties for the object.
In this example, the Marketing Unit Report is dependent on the MEGACORP table whose metadata is found in the /Shared Data/LASR Data folder. When you import this report, you will need to associate the report with the same or similar table in order for the report to be fully functional.
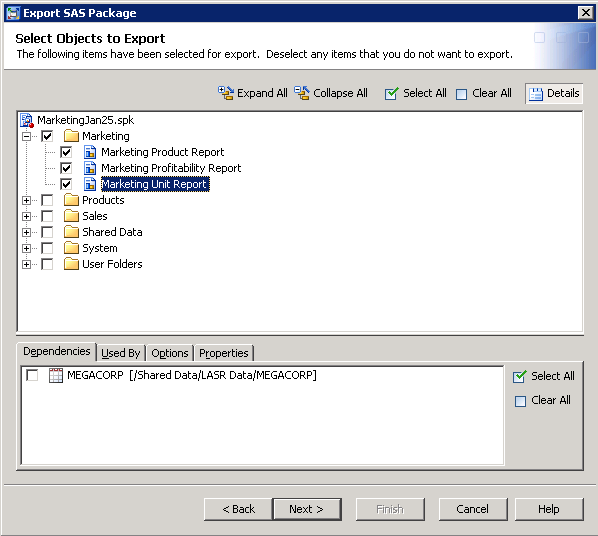
If you had selected Include dependent objects when retrieving initial collection of objects on the previous screen, all of the dependent objects would be listed and be selected for export by default.
Bonus things you get by default in the export package include:
- Permissions set directly on the objects
- For most object types, the export tools include both metadata and the associated physical content. For example, with reports you get both the metadata and associated report XML. For a complete list of physical content promoted with metadata objects, refer to: Types of Physical Content That Are Promoted with Metadata Object.
4. Review the description of the package that is going to be created and its content.
5. When the export process is complete (hopefully without errors) review the log.
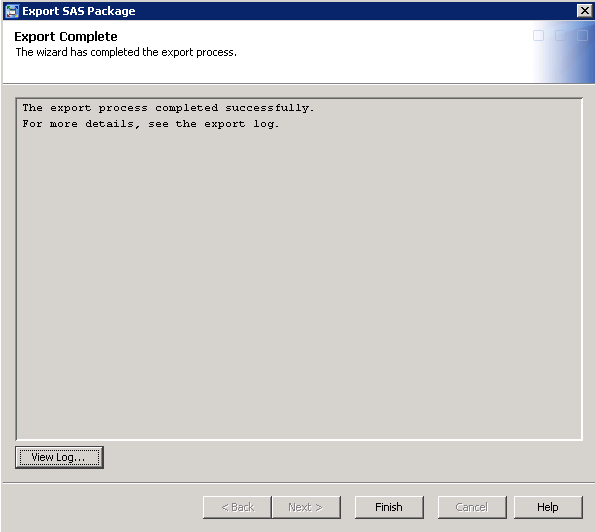
At the top of the log, you can see the location of the log file in case you want to refer to it later.
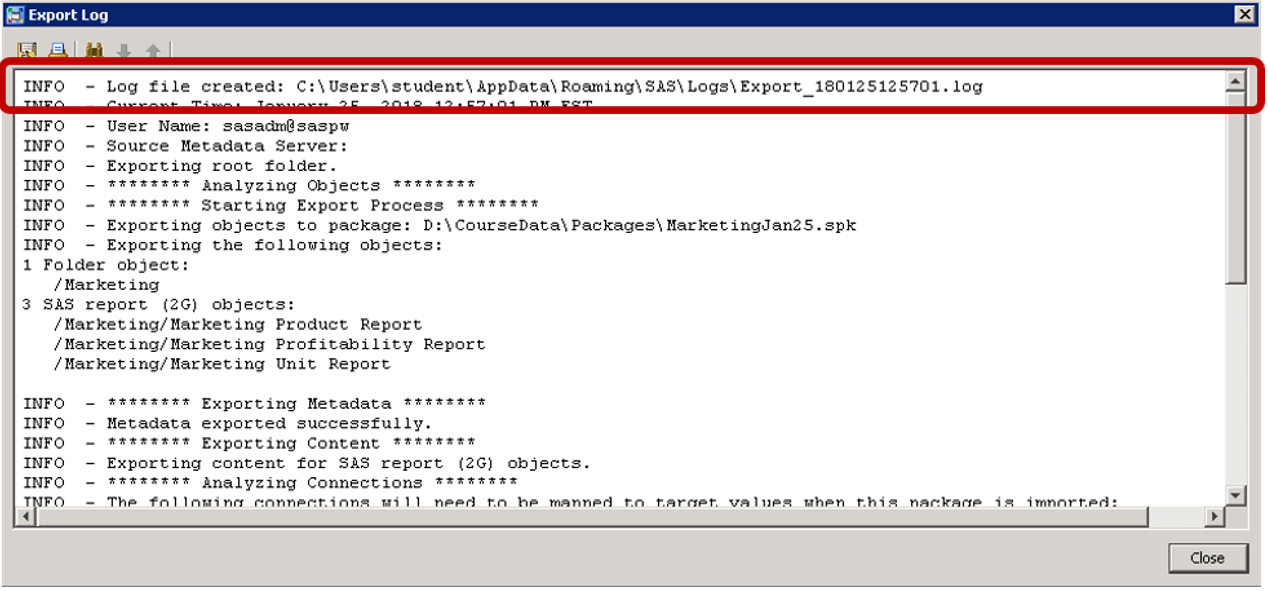
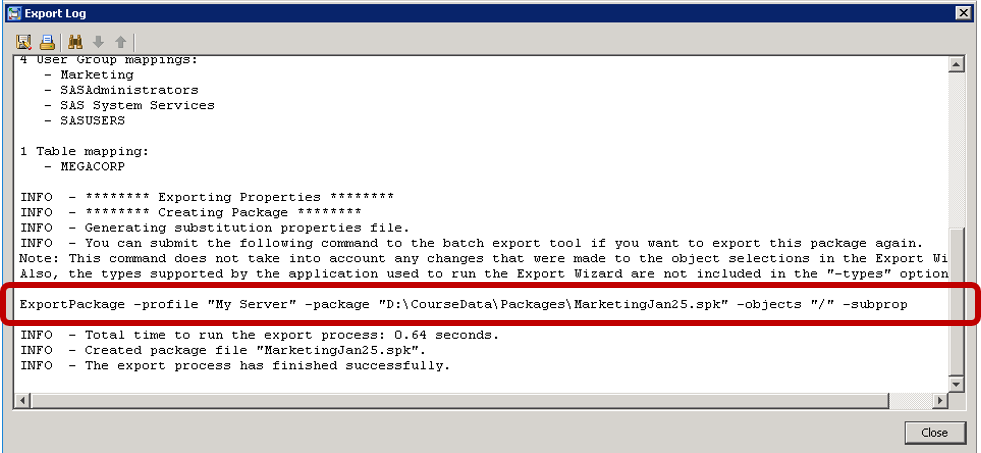
If you scroll to the end of the log, you’ll find the command line to invoke the batch export tool to create the same package.
Considerations for Exporting
- What account should you use to do the export or import process? The answer is an account that has enough access to metadata and when including items stored on the operating system the ability to run a workspace server and permissions to the physical resources in question. For more details, review the Preparing to Use the Promotion Tools section in the System Administration Guide.
- You should also consider also the size of the package that the export will create. If you are importing or exporting a huge number of objects, you can run out of memory. The documentation shows you how to adjust the memory if you need to. You can also create multiple, smaller, packages as an alternative to one very large package.
- Does it matter if you grab all of the dependencies when you export or not? It really depends on what’s available when you import objects.
- You do not have to initiate the export from the SAS Folders folder. You can initiate the export at a specific folder, or a specific object, or group of objects.

Importing to the Rescue
Let’s talk about what happens if and when you actually need to import some or all of the objects in a package file.
Let’s take a look at what we would need to do to replace an accidentally deleted report, Marketing Unit Report.
How to invoke the Import SAS Package Wizard:
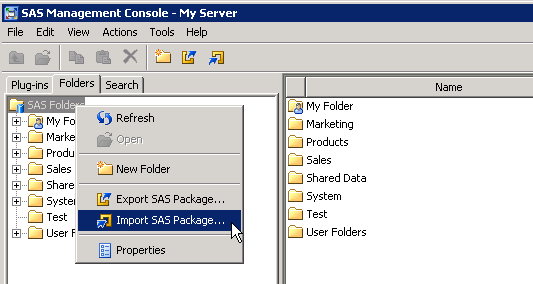
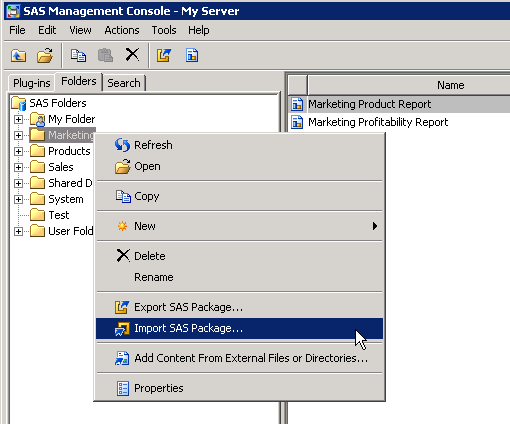
5. Right-click on the same folder you started the export, SAS Folders folder in our example, and select Import SAS Package. It is important to initiate the import from the same folder you started the export if you want to end up with the same folder structure.
6. If needed, use the Browse functionality to locate the correct package file.
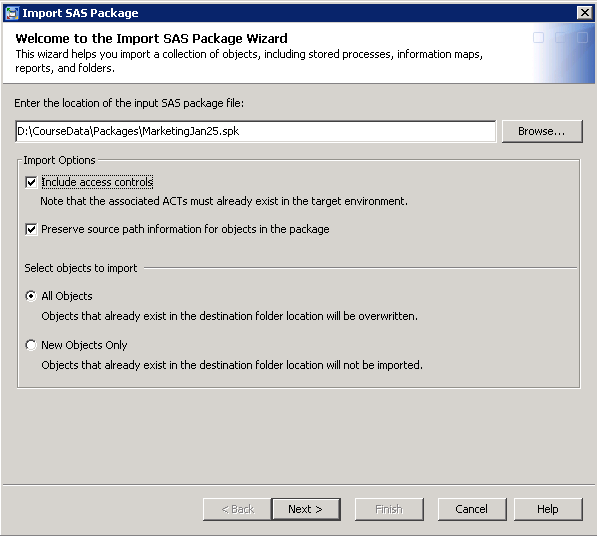
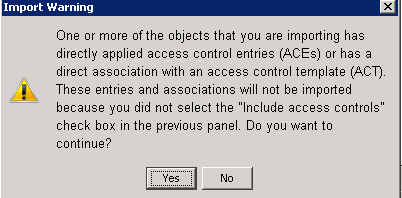
Include access controls
By default, Include access controls is not selected. This option will import permission settings directly applied to the objects in the package. It will not import any permissions if there were only inherited permissions on the object in the source environment.
Since we are bringing the report back into the folder it originally came from, it makes sense to also include direct permissions, if there were any.
If you do not check the Include access controls box and there are in face some direct permissions on objects being imported, you will get this warning later in the wizard:
Select objects to import
If you’re not sure whether to select to import All objects or New objects only, you can always start with all objects. You can use the Back buttons in the wizard to go back to previous prompts and change selections, at least before you kick off the actual import process.
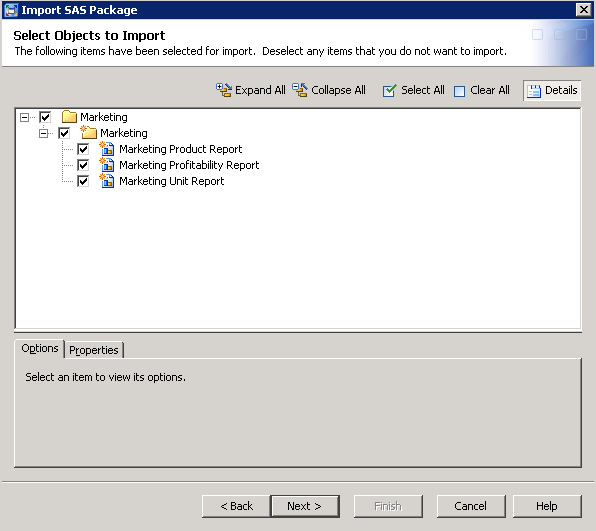
7. If you selected import all objects on the first screen, you will see a listing of all objects. Each object will have an icon indicating if the object currently exists where you are doing the import or not. The red exclamation mark indicates the object currently exists and doing the import of this object will overwrite the current object with the copy from the package. The asterisk icon indicates that the object does not currently exist and will be created by the import process.
In our example, the Marketing Unit Report does not currently exist in the Marketing folder but is in the package file so it is labeled with an asterisk. The other two reports are both in the folder and the package file so they are labeled with red exclamation marks.
You’ll want to make the appropriate selections here. If you want all of the contents of the package to be written to the Marketing folder, overwriting the first two reports and adding the Marketing Unit Report, leave all objects selected. If one of the reports had become corrupted, you could use this method to overwrite the current copy with the version stored in the package file.
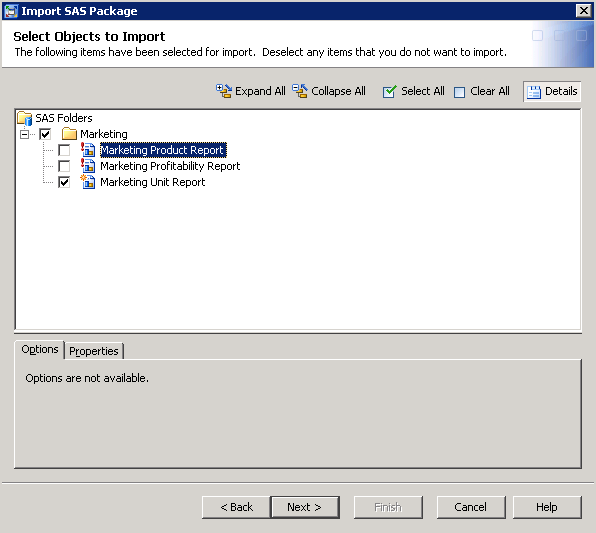
If you just want to replace the missing Marketing Unit Report, make sure only that object is selected as below:
By default, objects are imported into the same folder structure they were in when the export package was created.
8. Part of the import process is to establish associations between the objects you are importing and metadata not included in the package. You are first presented with a list of the metadata values you will need to select.
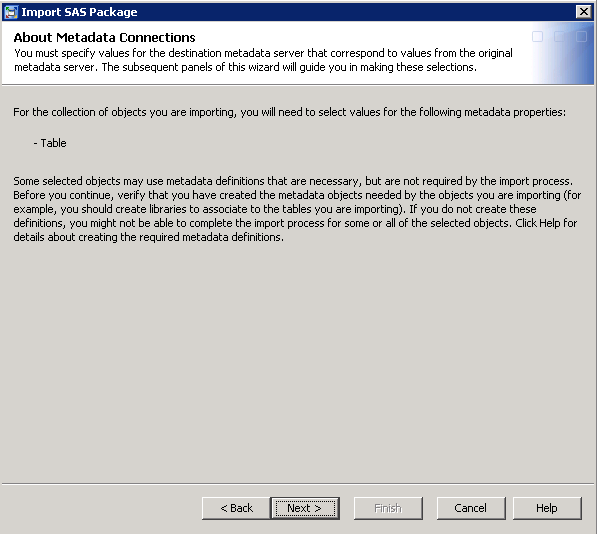
9. Set the target value(s) as needed.
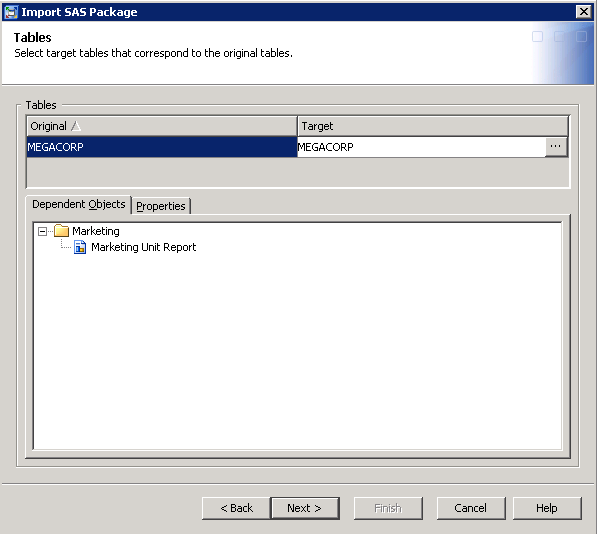
In our example, we definitely want the report to use the same table it used originally.
If we were moving objects to a new folder or a new environment, you might want to associate the report with a different table.
If you use the batch import tool, changing these associations would be done in a substitution properties file.
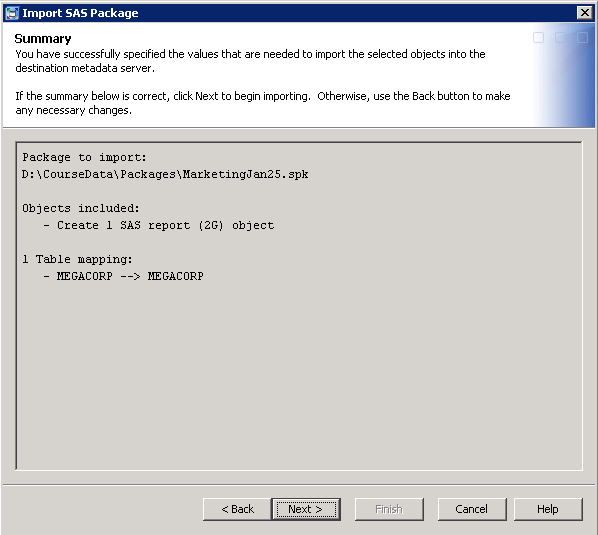
10. Review the import summary and initiate the import process.
11. Hopefully, the process completes without errors and you can review the log.
12. Finish things off by testing the content you imported. In this case, we would log in to SAS Visual Analytics and view the Marketing Unit Report.
Considerations for Importing
- If you initiated the export from the SAS Folders folder and try to import the package from another folder, Marketing for example, the wizard will recreate everything in the package, including a new Marketing subfolder which is probably not what you intended.
Notice the new Marketing folder inside the current Marketing folder. In addition, all three reports are considered new since the new Marketing subfolder does not currently exist.
- The account you use to do the import should have enough access to metadata and the operating system.
Next Steps
- Decide what you want to export, how often, and how long you want to keep a specific package file.
- Once you’ve gotten comfortable with the wizards and you want to schedule an export (or several), you should try out the batch export and import tools. When you name the export package, you can consider customizing the package name to include the date to avoid overwriting the same package file each time.
Review the documentation on both the wizards and batch tools in the SAS Intelligence Platform System Administration Guide.

4 Comments
Great Article Christine! You filled in the missing pieces I was just getting ready to look up!
Using the Export process via the Task Scheduler works great. Only caveat I found was having to make sure that you start it in the
SASPlatformObjectFramework directory
Looking forward to your next post.
Have an amazing day,
Thanks, Sandy
Thanks Sandy!
Great post. I hope you will follow-up with a similar post about using the batch export tool. I am not an admin, but as a BI Developer, I do create metadata objects. While the admins do backups centrally, I also backup all my SAS code, but I don't have a solid system for backing up metadata objects. My guess is I should start using the batch export tool to script backup / archiving of metadata objects. Then I could store the .spk file in source control, along with .sas files.
Thank you Quentin for the kind comments. I like the idea of a follow up post about the batch tools. I think what you are proposing sounds like a good direction to go in.