Last week I provided the steps for how to go on a date, at least by using dynamic prompts in BI Dashboard. Now that you have seen how to create them, lets discuss making them smarter. For this example, the customer is asking for two prompts to affect a single chart. These prompts will have a start date and an end date. If the user selects an end date that is before the start date, the report will fail to generate results. For example, data starting in June 2012 but ending in October 2011. Or in code terms a nonsensical where clause such as:
"01jun2012"d <= date <= "01oct2011"d.
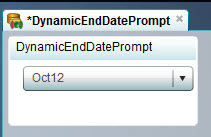
Here is an example of the BI Dashboard smart dating in action. Notice that when selecting June only October-July appear.
You too can create this to avoid possible user "errors". Included are the steps:
Step 1. Edit the stored process
In order to use the same stored process for both prompts, I will need to make some minor changes to the code.
| %global sdate; | Globally define the new parameter sdate for start date. |
| %macro dt; data test; format date monyy5.; %do i=0 %to 11; date=intnx('month', today(), -&i); |
This code is the same. |
| %if %length(&sdate) > 0 %then %do; if date > input("&sdate", mmddyy10.) then output; %end; %else output;; |
Test for the sdate existance using %length, if it exist only output end dates greater than what was selected. IMPORTANT TIP: Date values are passed from BI Dashboard as text and resemble mmddyy10 format. |
| %end; %dt ... |
Everything else is the same. Refer back to the rest of the code in Part 1 post. |
Step 2. Add a prompt to the stored process metadata
This will be used in BI Dashboard to define the relationship between the indicators. The prompt is optional as the code will work with or without a selected value so I did not select the prompt option 'Requires a non-blank value'. As you see below, I named the prompt sdate to match the code &sdate above.
Step 3. Create the second (end date) indicator
Since the data source itself does not change, I do not need to edit the indicator data object. A new indicator for the end date prompt needs to be created.

Extra TIP: Dynamic prompts assume that you will be leveraging a range initially. For these prompts, I select any range I have defined but when I am editing the properties of the prompt I change the prompt type from 'Combo Box with gauge' to just a 'Combo Box'. Then all the range questions disappear.
Step 4. Define interactions between the start date and the end date indicators
In the dashboard edit screen in BI Dashboard, add both the start date and end date indicators.
Select the start date indicator and choose the 'Interactions' task off the menu bar.

Select the interaction type 'Filter data on remote server' and choose source data 'date' with target data 'sdate' - as seen below.


